
In this lesson will explain basic concept of android button and android simple calculator with limited function.
Step 01
- First of all, we have to download the android studio application using this link
https://developer.android.com/studio
- Click on the above link, download and install the application.
Step 02.
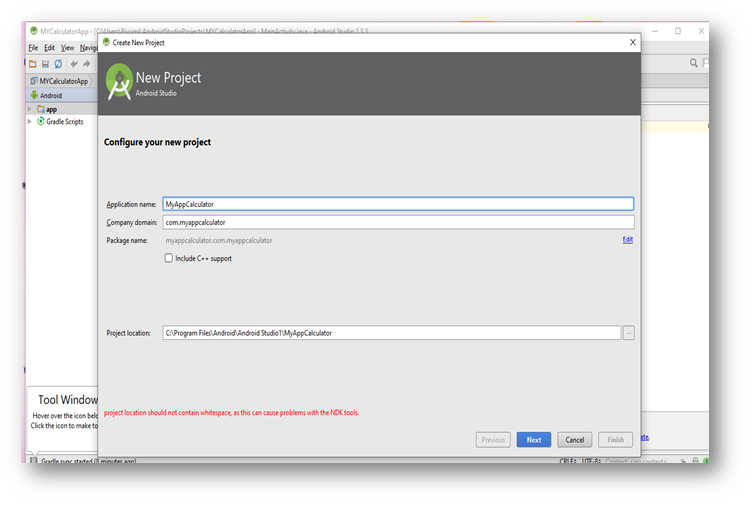
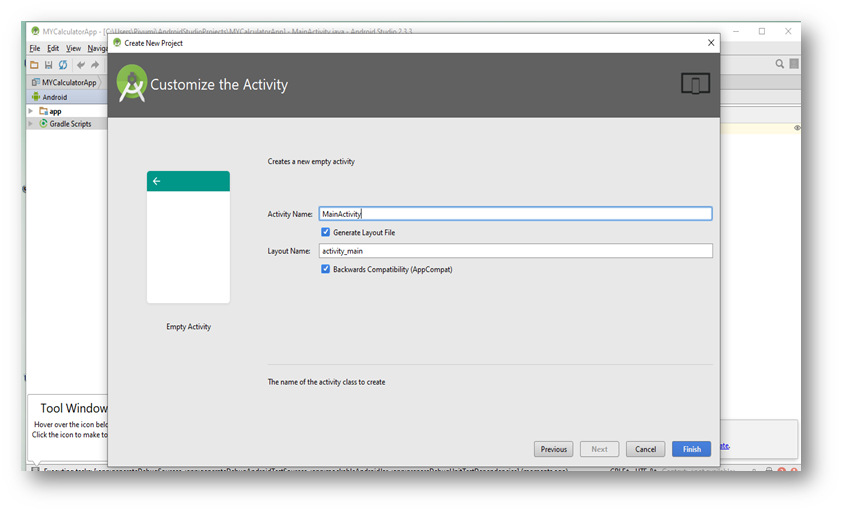
- Open the installed android application and click on the start new android studio project by the default it will give application name as ” adroidapplication” 01 but replace it with ” MyAppCalculator”.Then we need to provide the package name as “com. myappcalculator”.
- Then select the location where the project should be located. Click on the next button.
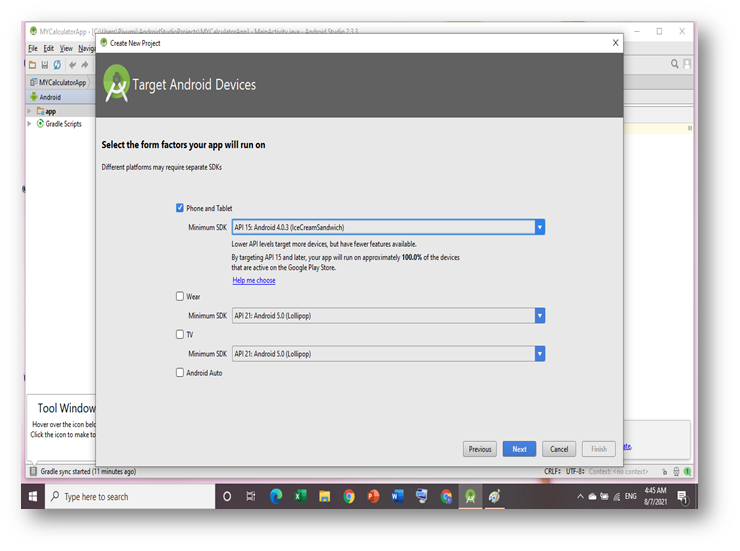
- Now select the target android device for the project. If you want to test the app using your project minimum SDK should be select like bellow mobile OS level. Then click on the next button.
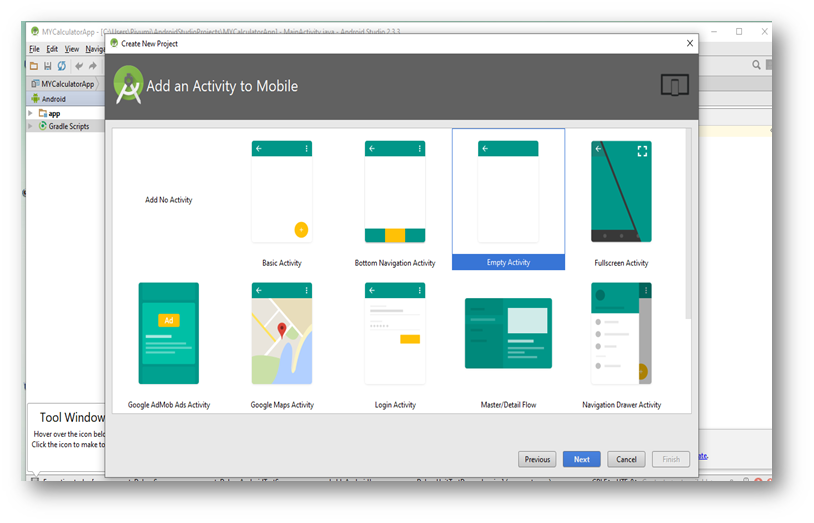
- Now select the blank activity/empty activity from the given activity list. Then click on the next button.
- Leave all activity field name as it is and then click on the finish button.
Step 03.
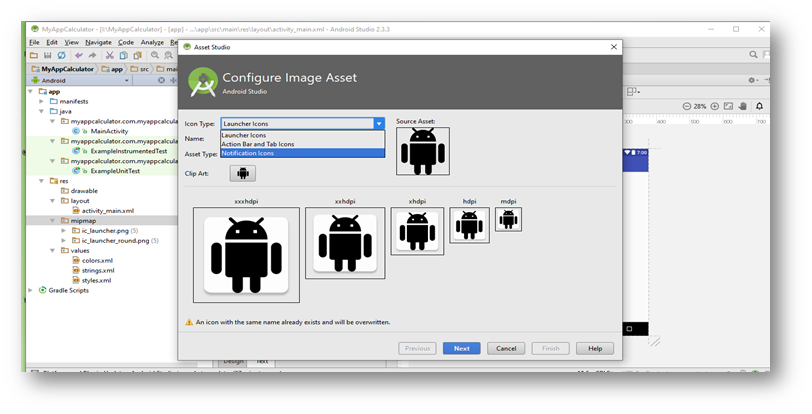
- If you want to change the configure images, using mipmap. Right click on the mipmap and select the new and then select the image asset.

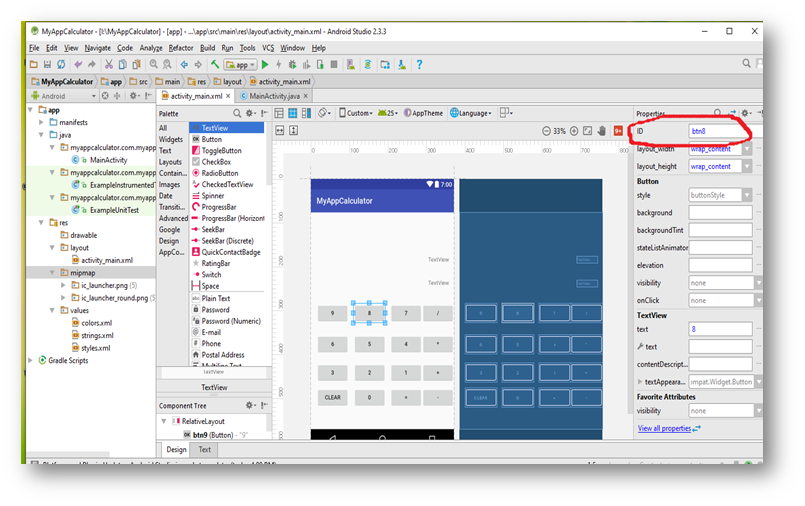
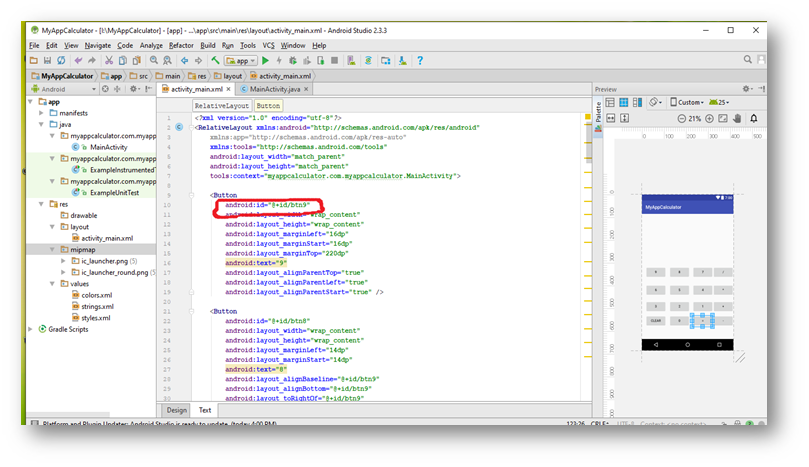
- Now click on the activity main.xml and click on the design button, then we can see the palette option and by drag and drop in the palate component(widgets) you can create app UI.
- When creating the UI, the activity_main.xml code will update automatically.
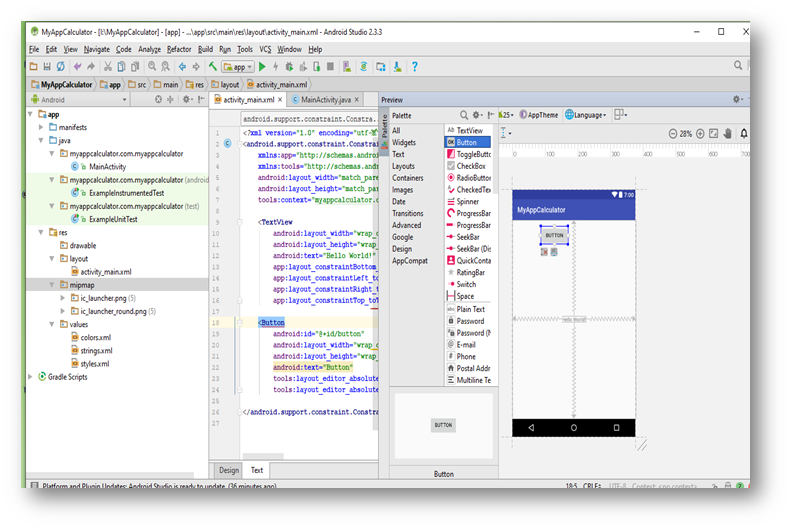
- Dragging the button and text field widgets create the calculator UI view.
- Change the button displaying value by clicking on the button and then edit the text value as 1, 2. 3….
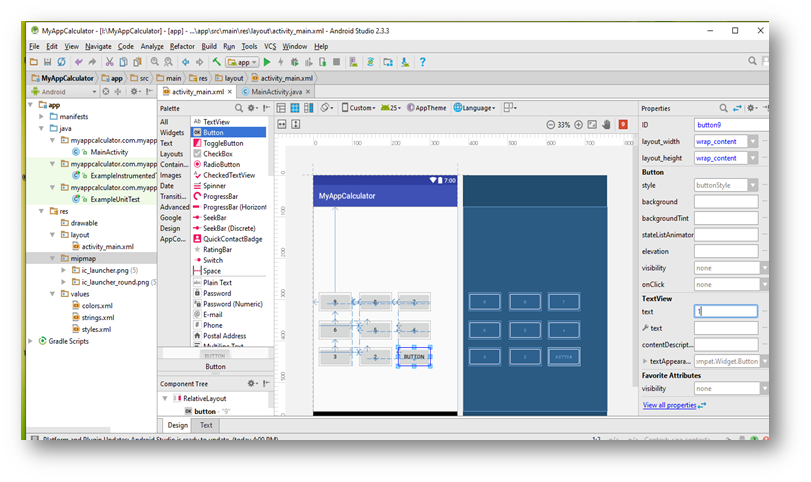
- Now change the button or text field id by clicking on the button.

- Changed Id value is displayed in the activity_main.xml.
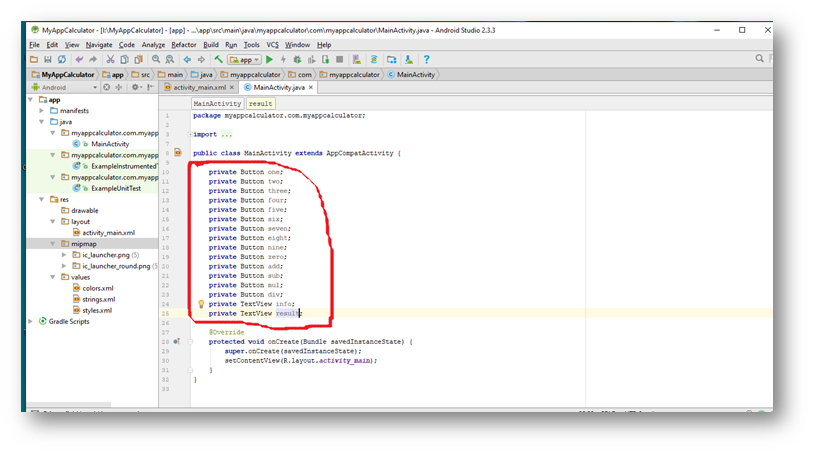
- Now should move in to the mainactivity.java page and defined the variables for created button and text fields.
Click here to learn about deep learning technic for natural image processing
3 thoughts on “How to make Simple calculator using Android Studio”